In the beginning... moulds
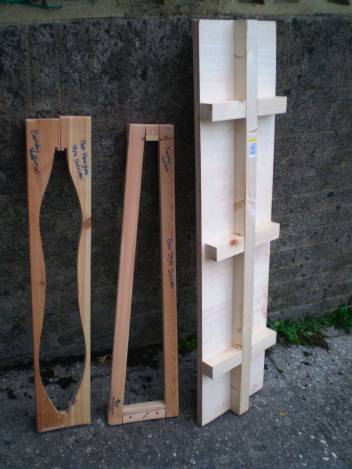
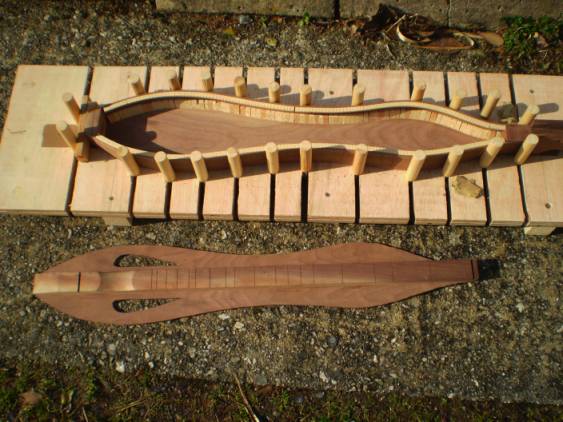
I started off by making copies of two dulcimer moulds owned by my teacher - these were for practise and reference, and for making more than one at once in future. My first bit of major work was making the adjustable mould pictured to the left. That required the first actual carpentry I'd ever done (Simple lap joints and use of a tenon saw, straightedge and chisels), and helped greatly with the rest of the processes.
The mould is a piece of 1" ply (Actually 2 sheets of 1/2" glued together), stabilised by a double-cross of pine. It has many slots running in the sides, in which posts with threaded rods fit. These posts can be slided in and out, then tightened with a wingnut, to allow for different shapes of dulcimer.
Cutting the Back
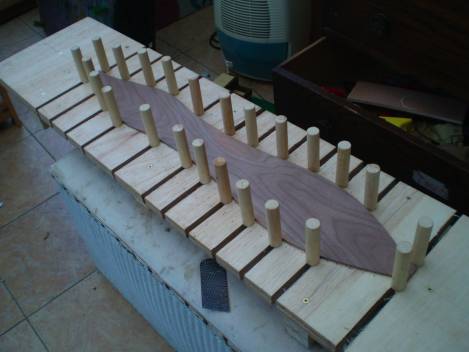
The back is now cut out and in the mould. The back was cut (by hand) from a sheet of walnut with a fretsaw to a 'thin hourglass' pattern taken from the hourglass mould pictured above.
Attaching the Fretboard

Before we did anything else, I attached the fretboard to the two bookmatched plates of the top. This was acheived with small nails and glue, and I used the mould to space the fretboard in the middle accurately.
Bookmatching is a process used to get large areas of wood with almost symmetrical grain. A large block of wood is split and opened up like a book to reveal the beautiful matching grain patterns.
Adding some Kerf
After bending the sides (No pictures, sorry), I glue in kerfing. Kerfing is the inner lining that holds the top and bottom to the sides. In Dulcimer 4, the bottom kerfing was made up of lots of little triangles, all separate.
The wooden bar in the middle forces the sides to adhere to the shape of the mould - bending is by no means a solid or permanent alteration of shape, and I need to practise a bit more before I can bend things into the right shape anyway! There were several of these bars spread throughout the dulcimer. Note that these are not braces, but are removed before the top is glued on.
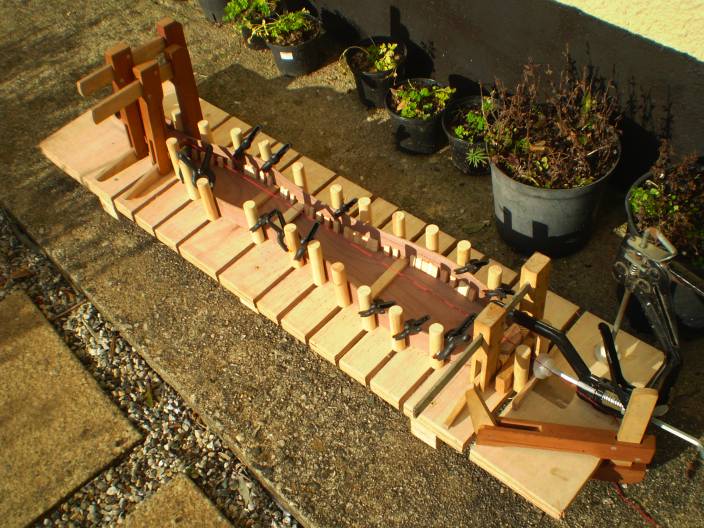
Left: The back and sides in the mould. You can see the crazy clamping arrangements required to keep the ends in the right places! This is something I will revise in future instruments. As well as bars holding the sides to the mould posts, there were also small clamps holding the tops, to keep the sides at 90°. These are small handy clamps that I keep close whenever I'm doing this kind of glueing operation.
Note: The red string down the middle was to try to centre the two ends. It didn't work very well, and one end needed correction later on, to align it with the other.
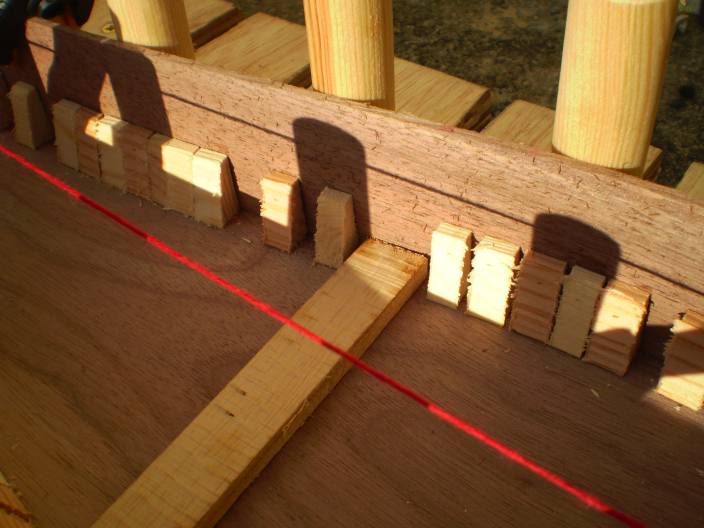
Top Kerfing

The kerfing for the bottom was made of individual triangles, but the kerfing attaching the top to the body needed to be in strips, to save bother. These were cut (From strips of boxwood, I think) in a little mitre box with a back saw, and I used a rather extravagant system to catch and funnel the strips of kerfing coming out. I managed not to break the strips too much using this system.
The back of the saw rests on the top of the mitre box, and I use sheets of thing card and paper to bring the wood up to just the right height to make a cut that doesn't go all the way through - a Kerf.

Left: The top kerfing going in. Glue (Titebond) is brushed on, then the strips are installed. They are held slightly proud (<1mm) of the tops of the sides by pegs and small clamps. It is essential that the join is good as this is what's holding the instrument together.
This is another advantage of using a mould - when using larger clamps, you can clamp straight onto a mould post, instead of attaching a caul (Block of wood inbetween the instrument and the clamp, to fit to the shape or protect the wood).

Working the Top
Now the body is safe glueing, I started working on the top. I cut out the shape (After having traced it off the body) with a few millimetres to spare for trimming. This cut was done with a coping saw, which left a rougher sawline than the fretsaw. The exces is taken off when the top is glued, with a finger/thumb plane.
After the top was cut, I started thinking about the soundholes. I drew out a shape that fitted with the shape of the dulcimer and made a template from some scrap walnut. The template was made so that I could hold the flat side against the fretboard, draw the shape onto the top and repeat on the other side, easily maintaining the same fretboard-to-soundhole distance.

At this point, the top is glued to the body. I don't have any pictures of this. Lots of clamps were involved, though!
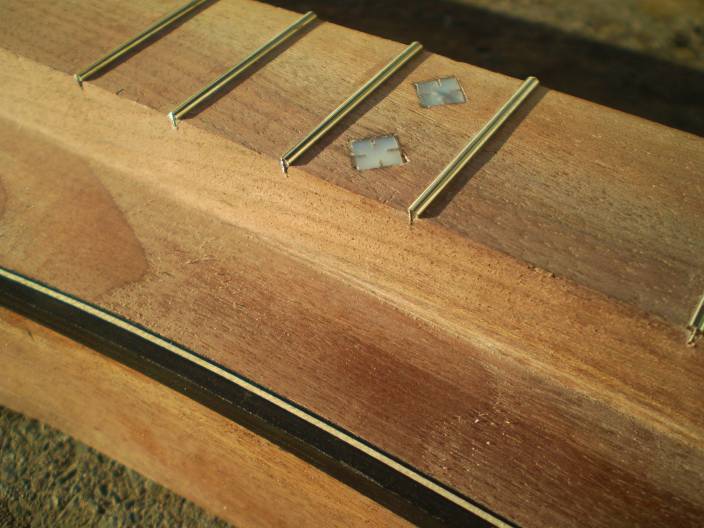
Left: Fretting also took place now, No pictures of that either, sorry. It involved trimming the fretwire to length, adding some wood glue and hammering them into the fretboard. The frets were left to dry for several days before I trimmed the ends and filed them - this is to reduce the chance of the frets sticking out as the wood contracts in dry weather.
As well as the frets, I inlayed the fret position markers, after cutting them from scrap mother-of pearl with a jewellers saw. To inlay them, I simply drilled shallow, blind holes in the fretboard, then used a chisel to take the corners out. Wood dust was mixed with araldyte and a blob put in the holes. The inlays were then put in and the escess wiped off.
Purfling
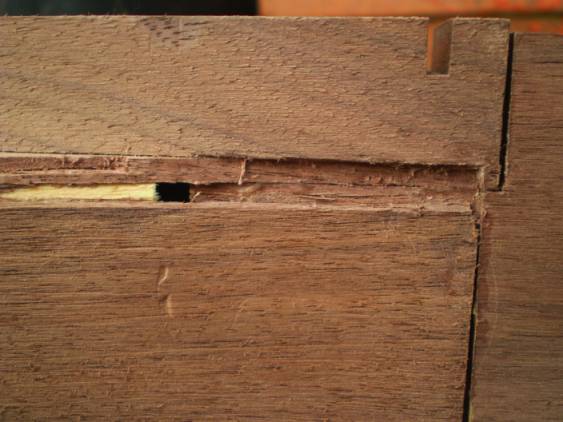
Purfling and Binding are the strips of wood that trim the edges of an instrument. Both are usually decorative, but binding also serves an important purpose in both holding the instrument together and retarding the entry of moisture into the top. The end grain is where this happens most often.
Right: This shows the top end of one of the channels that holds binding. To the left is the stepped channel cut out of the top and side, this holds binding and decorative purfling. Where the sides become flush with the fretboard, I carved a channel out with chisel and knife. This only holds binding.

Left: The binding and purfling (going in at once, one side at a time) held in with masking tape and clamps. The masking tape holds it in, then clamps hold it down, so there are fewer gaps I need to fill later.
Below shows how these channels are cut: with a purfling cutter. This is basically a very adjustable knife jig, that allows me to adjust the depth of cut and how large the cut needs to be. I only installed binding on the bottom, so I didn't have to cut a stepped ledge channel.

Scraping and levelling
All bindings and purfling are installed proud of the surface, so that they can be scraped flush. This is done with a cabinet scraper, which is essentially a piece of sheet metal with a burr drawn out on one side. It produces a much nicer finish than sandpaper, and takes a much shorter time.
Once the bindings have been scraped flush, they look a bit like this:
I wanted to do something a bit special with this dulcimer, and I figured out that one good thing to do would be to line the soundholes with purfling...

This was an interesting procedure that neither myself nor my teacher had attempted before: perform a cold, dry, sharp bend of thin delicate purfling, then glue it in in a seamless manner to a soundhole.
Usually wood is bent in the same manner I have been bending it throughout this project: wet, with a heated bending iron. For this, the iron was too big, and the heat and water would melt the glue between the white and black strips of wood.
We ended up bending the strips with our fingers only. Slowly, we coerced the purfling into shape. There were two strips per soundhole, one for each side. Once each was bent and fitted, I mitred the pointy end so that they would fit togther perfectly (with sandpaper). They were glued in with superglue, as we needed a solid fit instantly.
They worked perfectly! The first one I didn't install the pointy end proud of the top, so it looks a bit messy, but it worked fine. The second was installed perfectly proud to be scraped later, but the seam between the two strips wasn't seamless. Overall I was pleased with the soundhole purfling, and I will try to perfect the process in future dulcimers.
Finishing
No pictures of this, I can only describe how I finished Dulcimer 4. It took a very long time.
- First, the entire instrument was sanded with 320 grit sandpaper all over, to remove any scratches and generally finish the wood.
- Then, I raised the grain three times. This involves rubbing the instrument with a slightly moist cloth, then leaving the wood to dry and sanding down the resulting 'hairy' surface.
- Then, I rubbed in grain filler and sanded again with 320 paper. This fills in the pores of the walnut with walnut-coloured paste, and gives an amazingly smooth finish before lacquering.
- Then, the lacquering started. This invlolved lacquer being mixed and applied, using a brush, in sets of 3 or 4 coats.
- Then the lacquer is rubbed down to make a perfectly smooth surface, and the application is repeated several times.
- Once there's a good set of coats on there and the finish is totally smooth, I go in with wet-and-dry paper, taking the scratches out from the previous rubbing. 800 and then 1200 grit.
- Now, the finishing touch: T-Cut car body colour restorer. This is rubbed on, then buffed, resulting in the lovely, glowing, medium-gloss finish that the final dulcimer has. Ta-da!
And that's it. Apart from screwing in the tuners, tapping the nut and bridge in and adding the strings, the dulcimer was finished.