NOTE: This software requires Rosetta, and therefore will not work on Mac OS X 10.7 (Lion) and greater!
As a Mac-using fan of Lego Robotics, you have several options open to you. One is LeJos, a Java VM for the RCX that allows all kinds of great functionality and programming power. The other big player is NQC, a much more limited (and seemingly unexciting) C-variant. I quickly discovered that, actually, LeJos was near impossible to set up. There were countless errors in the source code which only a Java Guru could fix.
I was stuck, so I looked into NQC. I found there was a grapical UI for it, and that it actually offered decent programming power, especially with Firmware version 2. It wasn’t easy to set up at first, but now I know what the common problems are and how to sort them out. Here’s how to do it yourself – I’ve split it into the easy bit, the hard bit and the fun bit.
Ingredients:
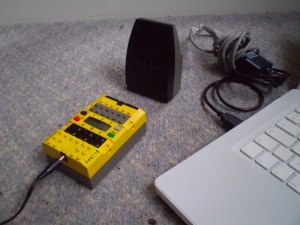
- An RCX
- An RCX IR Tower and cable (I use the Serial version, I have not tested the USB version)
- A USB-Serial adapter
- An admin password. There’s some installing to be done.
Some notes:
The USB-Serial adapter. You do not have to buy an expensive USB-Serial Adapter for this to work! It is important to get one that will work, however. I have heard that Keyspan ones work very well and have up-to-date drivers available. I didn’t want to shell out £30, so I bought a cheap adapter. It’s a ‘U232-P9’ — the same adapter comes in various cases and is sold by various suppliers — you can get them from amazon for very small amounts of money. And the important thing? With a bit of geekery, it works.
Walkthrough:
Installing things (Easy bit)
If you have the ingredients listed above, you can get right on with sorting everything out:
Start by installing the most up-to-date drivers you can find for your model of USB-Serial adapter. If you’re using the same, cheap USB-Serial adapter as me (Marked as U232-P9), you’ll want This Driver. Download and install – it comes as a package for easy install. You’ll have to restart afterwards – if you get an alert telling you there’s a new network port available, just press cancel.
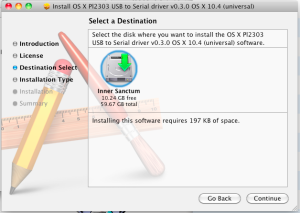
Next, you need a copy of MacNQC installed on your system. It can be downloaded here: MacNQC. You need to have Stuffit Expander installed on your system to be able to install it, and Rosetta must be installed to use it – I installed it off my OS X install DVD. To get it, insert the Mac OS X DVD and select ‘optional installs’. In the installer program, select ‘Rosetta’ and continue. All free, not too much faf.
Once you’ve downloaded both, navigate to your Downloads folder and double-click MacNQCX. It will ‘expand’, and you’ll be left with a folder of the same name. Move this folder either into Applications, or into a folder of your choice. I moved mine into Documents/Mindstorms, so that I had everything in one place. I would recommend this approach.
In order to program the RCX, you need to load firmware onto it, and MacNQC doesn’t come with any. See the box below about firmware, and download whichever one you think is best. If this is your first time, go with version 1 – you can always upgrade. You want to save it in a folder called Firmware, which is inside the MacNQC folder you moved earlier.
Firmware?!
Firmware is the operating system that your RCX runs on. Lego released two versions. V1 is smaller and quicker to download onto the RCX, but MUCH more limited (No event system, no arrays, no IR communication). V2 is much bigger, and therefore takes a much longer time to load onto the RCX, but opens up a vast amount of posibilitites.
Either version can be installed on any RCX. Go with V1 if it’s your first time. You can always upgrade.
To download: Right click and select ‘Save to’ or ‘Download to’.
Download Version 1 (FIRM0309.LGO) Download Version 2 (FIRM0328.LGO) Just to clarify: I refer to the two different versions as 1 and 2 because that’s the easiest thing to do. Technically, v1 and v2 actually versions 3.09 and 3.28 respectively, but I prefer calling them v1 and v2.
Getting them to Work
The easy bit’s over. Now, you have to use MacNQC to load whichever version of the firmware you’re using onto the RCX. Plug in your IR tower (via the USB adapter), turn on the RCX and open up MacNQC.
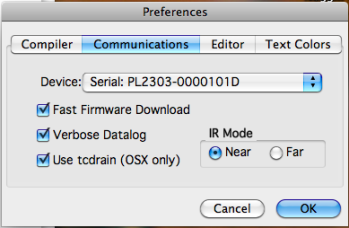
If this is your first time, a dialog will show, asking you to set up a communication device. Click yes, and follow the screenshots. If it’s not your first time using MacNQC, open MacNQC > Preferences.
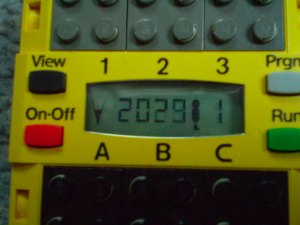
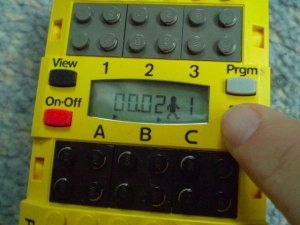
Now that’s done, in the menu, go RCX > Download Firmware. This will take a minute or so, so make sure the RCX is on and facing the IR tower. Rapidly incrementing numbers will show on the RCX’s display, and it’ll look a bit like the photo on the right (If you’re installing Firmware 2, that is, Firmware 1 doesn’t go that far up).
You want to select that serial device, and you want to tick all 3 boxes.
When it’s done it’ll bleep and should show a display with 00.00 and a little man on – Hooray! The firmware is installed.
That didn’t work?!
No, it quite possibly won’t. This is the stage at which the errors happen. I have loaded both versions of the firmware onto several RCXs many times, and I would suggest working through these easy fixes before trying anything too drastic:
- Turn off the RCX, quit MacNQC and make a cup of whatever hot beverage you prefer. Then try it again. Seriously, this works. If you’re having problems, repeat this step.
- Don’t touch your computer whilst the download is taking place. Again, sounds silly, but I have found that loading the firmware always works better if you click ‘download’, then walk off and leave it be.
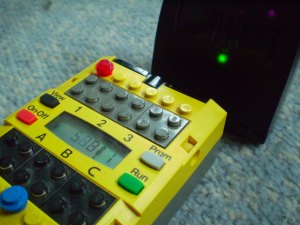
- Make sure the RCX is turned on, you have firmware in the Firmware folder and your IR tower lights up green when you try to download. If it doesn’t, then your drivers are wrong.
Now, have some fun!
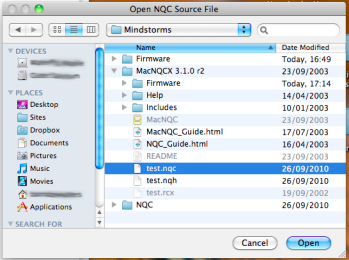
The tricky bit’s over! You can have a go with the test program included with MacNQC if you like – go File > Open and find ‘test.nqc’ (see screenshot). Open it and select Program > Compile and Download. The IR tower should light up, the RCX’s display will show a loading bar and make a bleep – you’ve downloaded the program!
On the RCX, select program 1 with the Prgm button, and ‘Run’ it (see photo). If you have a motor connected to port A, it should turn until a button attached to port 1 is pressed, or you quit the program with ‘Run’. Congratulations! You’ve got an RCX up and running NQC with a Mac!
Now, have a look through the NQC Guide that came with MacNQC – it gives an in-depth look into NQC and how to use it. A bit too in-depth for someone who just wants to get on and program robots, I know – so a NQC tutorial is coming soon. For now, check out this guide to Programming with NQC.
Well done…
…you’re up and running. Get building, get coding, and please do drop me a line (to barnaby@waterpigs.co.uk) if you make something cool!
If any of that didn’t work…
Simple checklist to sort out any simple problems:
- Make sure you installed everything you need in the order I listed it.
- Make sure you’ve got the right driver for your USB-Serial adapter.
- Make sure the firmware file is copied into the Firmware folder within the MacNQC folder.
- Make sure you select the right device and tick all the boxes during firmware download.
- Sounds stupid… but make sure you’ve got everything plugged in and the RCX turned on.
If you’re having problems, do feel free to contact me (barnaby@waterpigs.co.uk) and I’ll try to assist you.