1. the direction of a pcbnew (KiCAD) selection changes its behaviour. LtoR only selects completely surrounded parts, RtoL selects partially selected parts.

    I can’t find this feature documented anywhere, but the selection colours are different so I assume it’s supposed to be like this.

    EDIT: apparently it’s something of a de-facto UI standard in CAD apps, probably started by AutoCAD.
  2. It just took me about 30 mins to figure it out, so here’s how to install python plugins in KiCad 5.0 on a Mac.

    1. Make sure your build of KiCad has scripting enabled. It looks like fresh downloads have it by default, but it doesn’t hurt to check. Go KiCad → About KiCad → Show Version Info and make sure that all of the KICAD_SCRIPTING_ flags are set to ON.
    2. Find pcbnew’s plugin search path list. Open pcbnew, and open Tools → Scripting Console. Run import pcbnew; print pcbnew.PLUGIN_DIRECTORIES_SEARCH and you’ll see a list of folders which pcbnew will search for plugins
    3. Move your plugin files/folders to one of these locations
    4. In pcbnew, Tools → External Plugins… → Refresh Plugins. Your Tools → External Plugins menu should fill up with plugins.
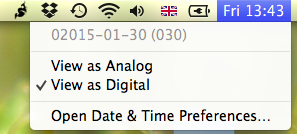
  3. My geeky system datetime format: longnow variant ISO8601 dates with ordinal day of year:

    02015-01-30 (030)

    Protip: leave out the longnow preceding 0 in the short/medium formats as otherwise the created/modified datetimes in the Finder column view will be truncated to just the date by default.

  4. Mac OS 10.6 spaces vs 10.9 full-screen apps/desktops — switching gestures a welcome addition, but muscle memory persistent “physical” location lost, replaced by ambiguous time-based UI which does exactly what you mean half of the time, and causes flow-breaking confusion+excise the rest of the time

  5. Anyone know of an iPhoto-like application which progressively enhances the filesystem instead of lumping photos into an application-specific blob of magic?

  6. Optimal video-splitting workflow on a mac:

    1. In Logic/QuickTime 7, figure out each of the ranges of video you want
    2. Open the movie in QuickTime 10
    3. Cmd + T to enter trim mode
    4. Set the handles to your range
    5. Cmd + shift + S to save as
    6. Close movie (export will continue)
    7. Repeat from 2 until complete