I added a cheap 1W laser diode to my X-Carve CNC machine for a total cost of €100 (€40 of which were laser safety goggles)

There are a multitude of these laser diode+controller packs available from China on eBay, from 1W to 12W. They typically don’t come with any documentation so it took some experimentation to figure out how to connect it.
My driver module required a 12V DC power supply, and then had a connector for ground and a 5V PWM signal, the duty cycle of which controls the laser power output. I tested this with a PWM signal from my Analog Discovery 2, and plugged it into gshield pin D11 (grbl spindle PWM output) after confirming it worked.

The latest build of grbl (1.1f) from Inventables supports laser mode, which makes some changes to the way M3-5 commands are handled, as well as making some changes to the acceleration to try to ensure linear laser power application.
All I had to do to set up laser mode was to activate it with $32=1 and set a max speed of 100 with $30=100 so that the laser power could conveniently be expressed as a percentage. If you use a speed-controllable spindle then you’ll either have to change this setting every time you change to laser mode, or express laser power in terms of your max spindle speed.
One confusing thing I found about M3 (always-on) laser mode was that the laser wasn’t always on. I had to send an empty G1 command to turn the laser on for focusing, and then it would turn off again every time a G0 was sent. I suppose this is a good safety feature, but does seem to contradict the laser mode documentation.
Generally I set up the laser (positioning, focusing) in M3 and then switch to M4 for cutting.
I created a reference board showing cuts at different power levels (y axis) and feedrates (x axis):

This shows that whilst cutting through anything other than paper probably isn’t possible with this little 1W diode, I’ll be able to get some really nice results engraving into wood, and hopefully other materials.

I was really hoping that I’d be able to run the laser engraver without dust extraction (i.e. much more quietly than milling!) but quickly noticed that the laser would often hit puffs of smoke generated from cutting, leaving gaps in the cut. Dust/fume extraction and high diode power levels are definitely a must for good results!

 ExactlyJ
 Edward Randell

 Sven
Sven

 Julian Oliver
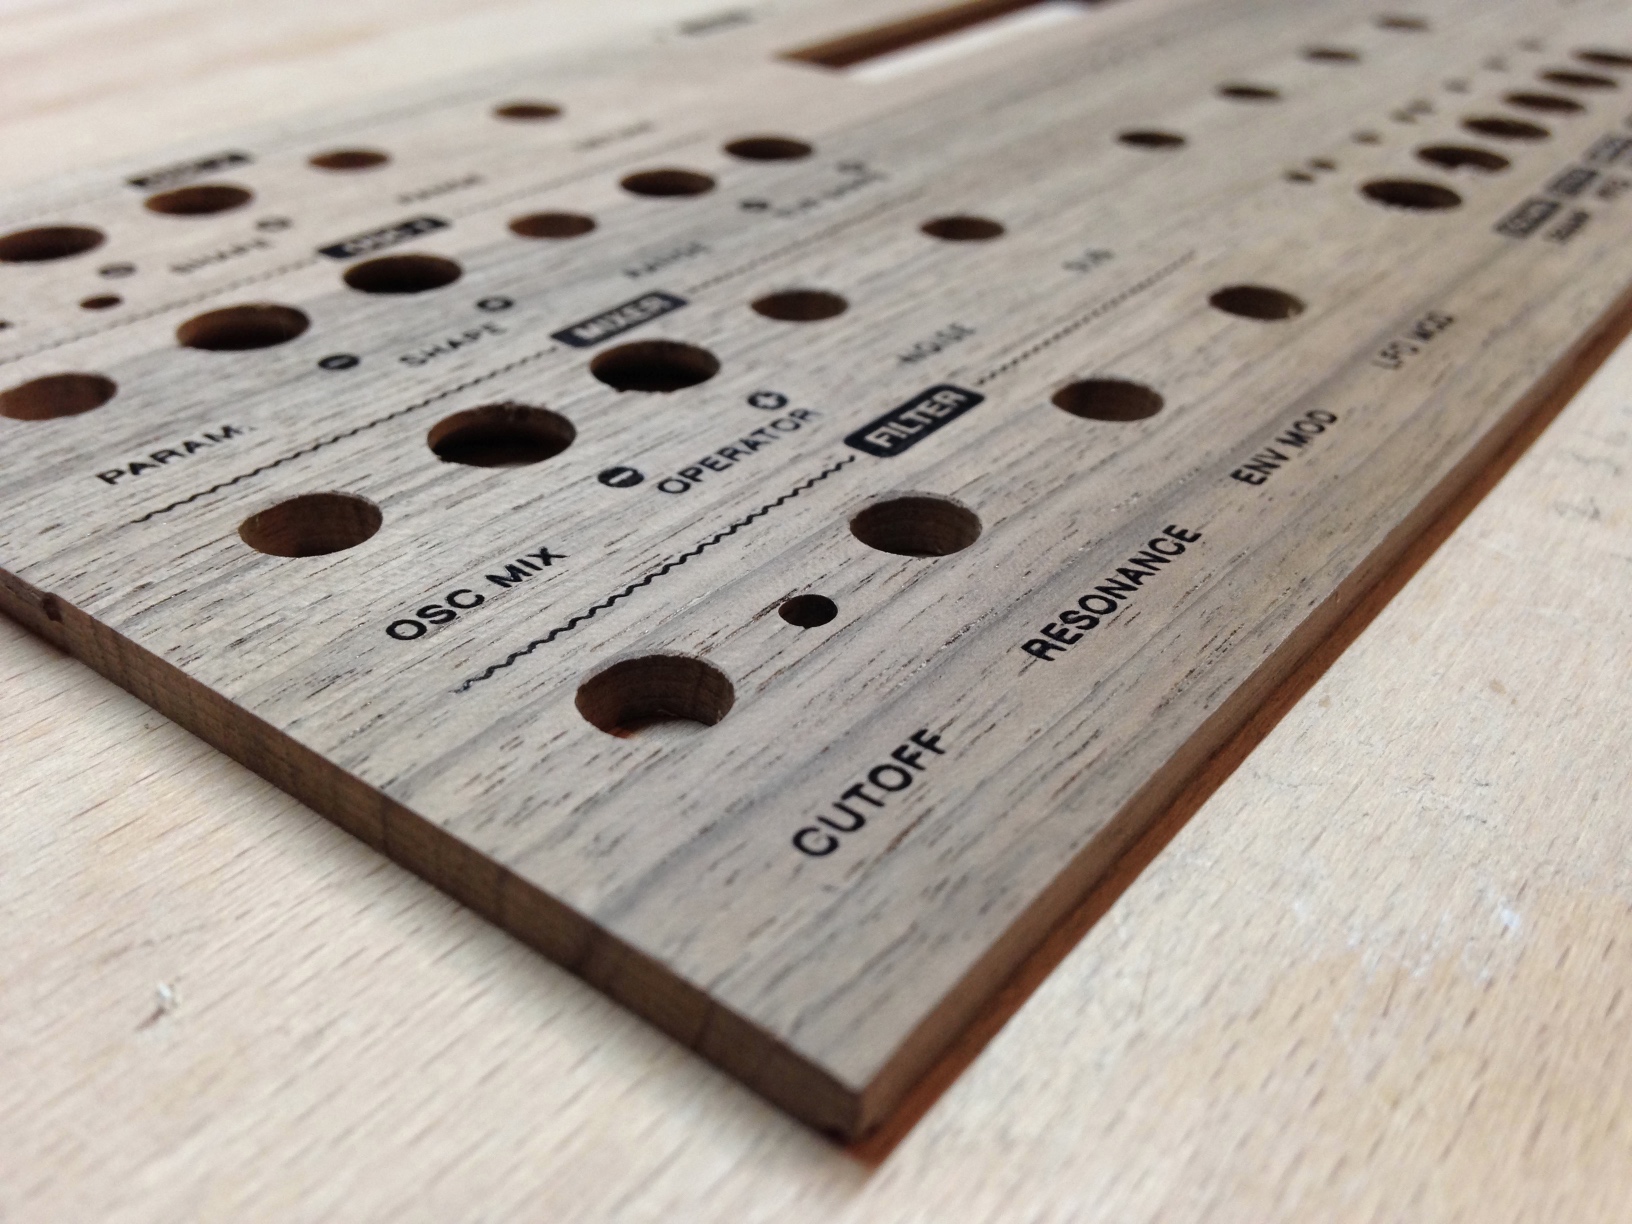
 Ben Werdmuller

 Tom Morris 🏳️🌈